
Vibe Coding
Explore your idea quickly with disposable code

I’ve been using Claude Code to write code recently. I don’t think this is a new or controversial idea, but vibe-coding is an extremely valuable tool for PMs and stakeholders to refine and express their ideas for new products, while AI-coding is a critical skill for software engineers to develop. This post is meant to introduce some practices to make vibe-coding safer and more effective, and I’ll follow up with one on AI-coding shortly.
Vibe- vs AI-Coding
I’m not using these terms interchangeably - by vibe-coding I mean writing code that’s meant to be disposable. You verify that it mostly works, but you’re probably not reading any code. AI-coding results in code that is meant to be read and run in production, and requires a more thoughtful review process.
Baby’s First Vibe-Code
The most basic, get-your-feet-wet thing you can do is use Claude Code on the web. It’ll show you what it’s capable of, it’ll deploy webservers, and it’ll write to your Github repos. It’s a fine place to start.
Vibe-Coding for Adults
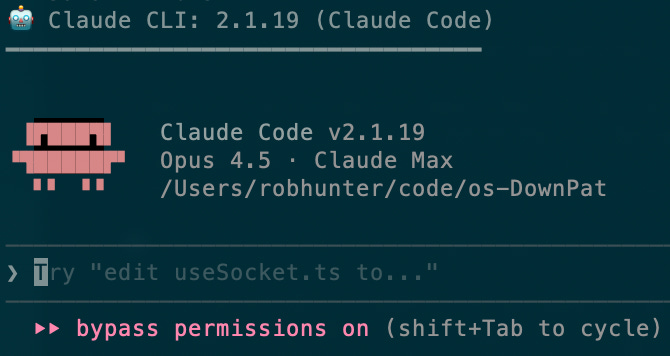
This is the setup that really got me started. Because you’re running Claude in permission-less mode it’s fast, and because it’s in a container it’s safe1.
Claude Code is the leader in coding agents, at least in terms of adoption. There are alternatives like Cursor, Gemini CLI, Github Copilot CLI, there are open source forks that let you use your own models (including open source local or AWS-hosted models), but I recommend starting with the most popular option.
By default, Claude Code can write code, make filesystem operations, install things, etc, but only with permission. Constantly approving actions is slow, and the repetitive prompts can lead you to approve changes without reading carefully - the wrong approval can lead to disaster. So I run Claude Code in a Docker container, where it can do very limited filesystem damage.
You should still be using a version control like git if possible. Claude will sometimes go down rabbit holes, and you’ll want to revert to a previous state. Commit often with sufficiently descriptive commit messages.
Setup
I’m assuming that you’re running a Mac. This should all work the same on Linux, but I’m sure the Windows commands are different.
Install Docker. You’ll need to create a free account. Download and install the desktop client from that page. Open the docker client and get through any onboarding/login.
Set up Claude Code with these instructions. You’ll also have to set up a subscription (recommended) or pay-as-you-go API key. For now you can sign up for the $20/mo level, though I hit my limit pretty quickly and needed to upgrade to $100/mo. By the end of this, you can run which claude to verify it’s available.
Install agentbox:
git clone https://github.com/fletchgqc/agentbox.gitcd agentboxchmod +x agentboxecho ‘export PATH=”$PATH:’$(pwd)’”’ >> ~/.zshrc
Start it up
Make and navigate to your project directory. I keep my projects in ~/code. Example:
cdmkdir codecd codemkdir my-first-projectcd my-first-project
agentbox -p 3001
Follow the directions onscreen. It’ll have you copy and paste a url to a Claude authentication screen, which then has you copy and paste a token back.
Then you just tell Claude what you want it to build. Here’s an example prompt:
I’d like you to build and run a simple webapp that hosts a todo list. The user should be able to add, delete, cross off, reorder, and edit their todo entries. Each entry is just a simple string. Please run the app on port 3001.
The -p argument above has agentbox open up that port, which lets Claude run an app and for you both to access it. Claude will almost certainly say so, but you should be able to access the app that Claude writes at http://localhost:3001.
Tips and Tricks
Work with the agent to build a spec
Probably the first trick EVERYONE gets to is working from a spec instead of your simple prompt. And you realize pretty quickly that you can get Claude to write most of the plan / spec, so you’re not spending a day working on user stories.
I tend to start with Claude’s web interface and pitch the idea that I’m trying to build. I’ll include the detail that I can think of, but will then ask it to come up with concerns and open questions. Here’s my Thomas spec prompt again - they tend to be 1-3 paragraphs, and invite a brainstorm.

After that’s done, I ask it to put that into a Markdown file, which I include in my project directory when I start the project.

Specify the tech stack
It’s easier to have the coding agent write something you’re familiar with if at all possible. I tend to ask it for a Node.js/Express/React app, because that’s what I’ve been working on most recently. Sometimes this isn’t possible (ex: Thomas), and sometimes you specifically want to include tools that you’re not familiar with. But if you can, start with what you know.
Claude.md
Most projects have a claude.md file. Sometimes Claude makes it itself, but if you provide it Claude will take a look at it. If you find that you’re repeating yourself with some kind of guidance, put those instructions in here. Mine is 354 lines, and there are times that I’ll have Claude add or edit this file directly.
Use shot-scraper for browser verification
I was running into a problem where Claude would write a lot of code and declare it complete, and then the server wouldn’t run. Or the first click would fail. Or the second click would fail.
Out of the box, Claude Code can make API requests, it can make curl commands, but it needs to install tools to validate rendering and use javascript. And it’s reluctant to offer that, you really have to give it instructions. A couple years ago Simon Willison wrote shot-scraper, which gives Claude the ability to do some things, then wait, then take a screenshot and evaluate it. This makes UI verification work much, much better and wastes way less of your time (but it takes Claude a lot longer).
I have the following entry in my claude.md:
## Definition of Done
The user’s time is much, much more valuable than yours. Do not EVER ask the user to do something that you could do. For verification steps, you should complete the exact same verification steps yourself BEFORE asking the user to do so. If there’s a verification step that you cannot perform, try to develop a plan to be able to perform it. If you ask the user to perform a verification step that you have not verified first, you MUST explain why you could not verify it yourself.
You should ask the user to approve an important design decision or dangerous change (ex: deleting data). You should NEVER conclude that a task is complete or ask the user to verify a change without first verifying it yourself.
And
## Milestone Workflow
1. Complete one milestone at a time
2. Fully verify before proceeding to the next milestone via unit tests, integration tests, AND inspecting browser screenshots with shot-scraper
3. Proceed through each step in the plan unless you’ve hit a wall and require human intervention to proceed
These two entries, along with a bunch of Claude-generated lines about how to use and install shot-scraper, have saved a bunch of [my] time.
What’s Next?
There are times when vibe coding is the thing you should be doing. You’re exploring! Figure out what works and what doesn’t, figure out if your idea is possible, test to see if anyone will use it. If good enough is good enough, then the above can get you there quickly. Often showing someone a prototype is much more effective and engaging than telling them your idea.
If you need this code to stick around, be read and maintained, then vibe-coding has very significant drawbacks. Testing, reviews, reasonable PRs all become important again. I’ll post about that shortly.
MOSTLY. It can still leak credentials in web requests, but it’s much, much harder for it to break your computer.